Gift Sets
 Fragrances
 Whip Lush
 BYOB Sale

 Eye Like Options
 Glow Getter
 Dart Its
 Stacked In Your Favour
 Bundles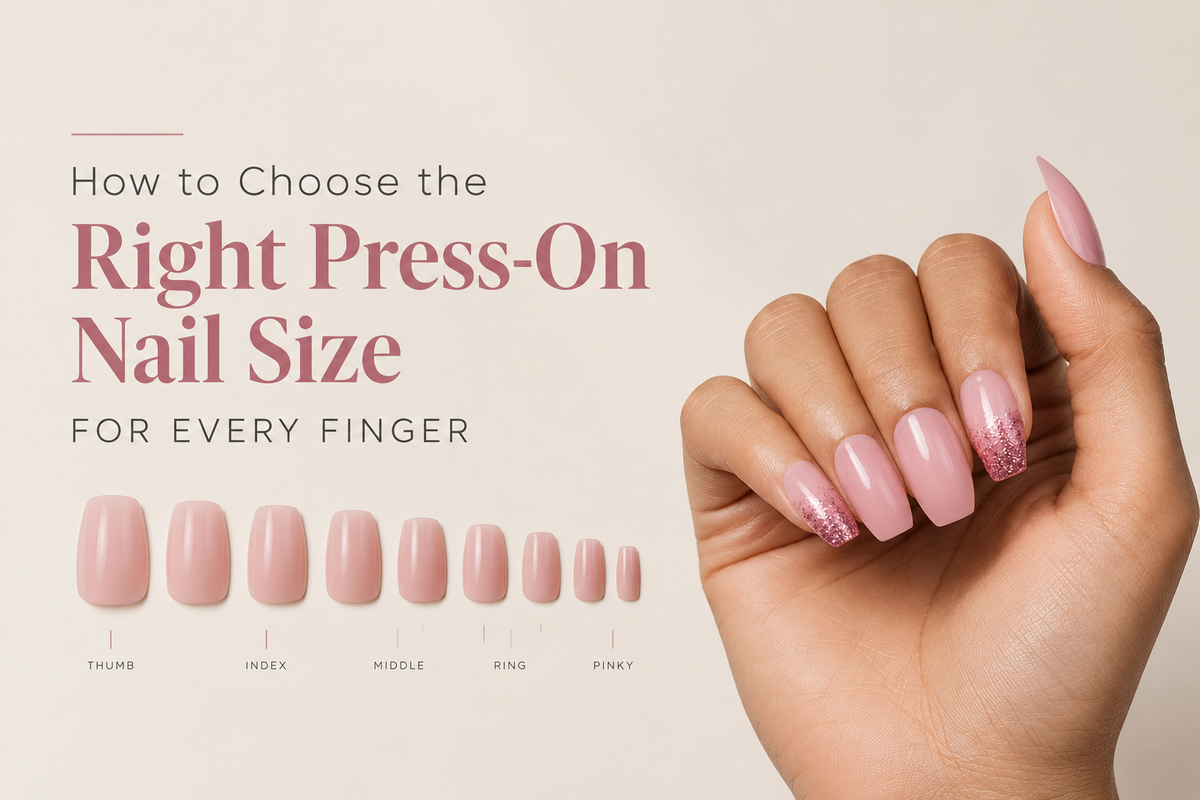
How to Choose the Right Press-On Nail Size for Every Finger
Press-on nails that fit correctly look salon-quality and last up to two weeks. Press-on nails that are the wrong size lift at the edges, look artificial, and fall off within days.
Sizing is the step most people get wrong, and it is also the step that makes the biggest difference to every outcome you care about with press-ons: how natural they look, how long they hold, and whether they damage the natural nail when you remove them.
This guide covers exactly how to find your correct size for every finger, what to do when the fit is not quite right, and how the Gush Beauty press-on nail collection is structured to help you find the right fit across different shapes and lengths.
Why Sizing Matters More Than Any Other Step
Most guides on press-on nails spend the most time on design selection and application technique. Sizing gets a paragraph, if that. This is backwards.
You can have the most beautiful design, apply it perfectly, and use the best adhesive available. If the size is wrong, the press-on will lift. When a press-on lifts at the edge, moisture gets underneath. When moisture gets underneath, the adhesive fails faster. When the adhesive fails faster, the nail comes off.
A press-on that is too wide extends beyond the natural nail onto the surrounding skin. Adhesive on skin does not hold the same way it holds on nail. The press-on lifts from the sides within a day or two.
A press-on that is too narrow leaves exposed natural nail on either side. The uncovered edges create weak points where the press-on can catch, flex, and eventually break or lift from that edge.
The correctly sized press-on covers the nail plate from sidewall to sidewall without touching the surrounding skin. It holds consistently because the entire contact surface is nail rather than skin, and there are no exposed edges for the design to catch on.
Does sizing affect how natural press-on nails look?
Significantly. A press-on that is too wide creates a visible gap between the design and the skin, which reads as artificial. A press-on that is too narrow leaves an obvious strip of natural nail visible on either side. The correctly sized press-on sits flush at the sidewalls and looks like the nail simply looks this way, not like something applied over it.
Understanding How Press-On Nail Sets Are Sized
Most press-on nail sets come with multiple sizes in the box, typically numbered from 0 to 9 or from XS to XL depending on the brand.
The numbers do not correspond to a universal measurement standard. A size 3 from one brand is not the same width as a size 3 from another. The numbers within one set are relative to each other: a lower number is wider and a higher number is narrower, or vice versa depending on the brand's system.
What this means in practice: you cannot use your sizing from one brand or set as your starting point for a different brand or set. You need to size each new set independently, at least the first time you buy it.
The Gush Beauty press-on nail collection includes multiple sizes in each set to fit different finger widths. Finding your correct size within each Gush set you purchase gives you a reference for that design that you can use for every subsequent purchase of the same set.
How to Measure Your Nail Size at Home
There are two reliable methods for finding your correct press-on nail size at home: the tape method and the press-on fitting method.
The Tape Method
Cut ten small strips of paper or tape. Place each strip across each nail at the widest point of the nail plate. Mark where the strip meets each sidewall. Measure the width of each strip between the marks. This gives you the width of each nail plate in millimetres.
Write down all ten measurements. Your dominant hand and non-dominant hand will often have slightly different measurements, which is normal. Label by finger: thumb, index, middle, ring, and pinky for each hand.
When you receive your press-on set, hold each size against the corresponding finger measurement and choose the size that most closely matches without exceeding the width of the nail plate.
The Press-On Fitting Method
Most press-on nail kits include enough sizes to work through a fitting process directly.
Open the set and lay out all available sizes. Starting with your thumbs, hold different sizes against the nail plate without applying adhesive. The correct size sits flush at both sidewalls of the nail without hanging over the skin on either side.
Work through every finger, thumb first down to pinky. Write down the correct size for each finger as you go. This becomes your size chart for that set.
Do this fitting process with dry, clean nails, not freshly moisturised ones, so the press-on does not slide around during the fitting.
Which method is more accurate?
Both are accurate when done correctly. The tape method is more precise for comparing across different sets or for ordering custom sizes. The press-on fitting method is faster and more practical for everyday use with a standard set. The fitting method is what most people use and it gives very reliable results when done carefully.
Sizing Each Finger
Your fingers are not all the same width relative to each other in predictable ways. Do not assume that because your middle finger takes a size 4 in one brand, your ring finger takes a size 5. Measure each finger independently.
The Thumb
The thumb is almost always the widest nail and takes the largest size in any set. Because the thumb nail is wider and often has a squarer or flatter curve than the other nails, sizing here is about both width and curvature. The press-on should cover the full width and sit flat against the nail surface without lifting in the centre.
The Index Finger
The index finger typically takes a medium size within any set. The width is usually significantly narrower than the thumb but wider than the ring and pinky fingers. The index finger is also one of the most active fingers, which means getting the size right here has a significant impact on how long the press-on holds through everyday use.
The Middle Finger
The middle finger is usually slightly wider than the index and ring fingers. It often takes a slightly larger size than the index. In some people, the middle and index take the same size.
The Ring Finger
The ring finger is typically narrower than the middle finger and similar to or slightly narrower than the index. It often takes a similar size to the index finger.
The Pinky Finger
The pinky nail is almost always the narrowest and takes the smallest size in the set. Getting the pinky right matters because a too-wide press-on on the pinky is immediately visible and lifts quickly from the angled sidewalls of this finger.
What if no size fits my pinky finger correctly?
Pinky nails are often narrow enough that no available size in a standard set fits perfectly. If the closest size is very slightly too wide, you have two options. File the sides of the press-on gently to narrow it by one or two millimetres before applying. Or choose the closest size that slightly overlaps the sidewall on one side and position it to fit the other side, accepting a very minor imperfection on one edge. The first option gives a better result.
What to Do When the Size Is Between Two Options
This is the most common sizing challenge. The size above is too wide and extends onto the skin. The size below is too narrow and leaves natural nail showing on the sides.
When this happens, choose the larger of the two sizes and file it down.
Hold the press-on against the finger. Mark where the sidewalls should sit with a pencil or nail-safe marker. File the sides gently with a fine-grit nail file, working in one direction rather than back and forth. Check the fit against the finger frequently as you file. Stop when the press-on sits flush at both sidewalls without touching the skin.
This takes two to three minutes per nail the first time and gets faster with practice. The result is a significantly better fit than either of the original sizes, and the press-on holds substantially longer because the contact surface covers the full nail plate correctly.
Can I file the back of the press-on to adjust the curvature?
Yes. If the press-on sits high in the centre or does not conform to the natural curve of your nail, lightly buffing the back of the press-on at the centre reduces its curvature slightly and improves the contact. Do this gently and check the fit frequently. The goal is better surface contact across the full nail, which improves adhesion and reduces air pockets underneath.
Sizing for Different Nail Shapes
Different press-on nail shapes within the Gush Beauty range have different sizing considerations.
Round and Oval Press-On Nails
Round and oval shapes curve at the sides as well as the tip, which means the fitting check needs to confirm both the width at the widest point and that the curve of the press-on matches the curve of the natural nail sidewall. A round press-on that is the right width but has a steeper curve than the natural nail will lift at the sides even when the width appears correct.
Browse round shaped press-on nails and oval shaped acrylic nails at Gush Beauty.
Square and Squoval Press-On Nails
Square and squoval shapes have straight sides, which makes width fitting more straightforward. The check is primarily about width at the sidewalls. These shapes are the most forgiving to fit because the straight sides mean a slightly narrow press-on does not create a noticeable curved gap at the sidewall the way it might on a round shape.
Almond Press-On Nails
Almond shapes taper from the base toward the tip. The widest point is near the base of the nail, so sizing is checked at that widest point. An almond press-on that fits correctly at the base covers the full width of the natural nail without extending onto the skin on either side.
Browse almond shaped nail extensions at Gush Beauty.
Coffin Press-On Nails
Coffin shapes have straight sides that taper to a flat tip. Like squoval, the straight sides make width fitting relatively straightforward. The check is at the widest point near the base, which should cover the full nail without any overhang onto the skin.
Browse coffin shaped nail extensions at Gush Beauty.
Length Sizing and Its Effect on Fit
The length you choose does not directly affect the width fit, but it does affect how the press-on sits on your nail and how long it holds.
Longer press-on nails have more surface area extending beyond the natural nail tip. This extension is supported only by the adhesive on the nail plate rather than by the natural nail beneath. The longer the extension, the more leverage any force applied to the tip exerts on the adhesive bond at the base.
For everyday wear and maximum hold, shorter and medium lengths hold significantly longer than very long ones because the ratio of supported to unsupported length is more favourable.
Browse by length at Gush Beauty using short length nail extensions, super short nail extensions, medium length press-on acrylic nails, and long length press-on nail extensions.
Should I choose a shorter length for my first set of press-on nails?
Yes. Shorter lengths are significantly easier to manage for everyday activities, hold longer due to the better supported-to-extension ratio, and are less likely to catch on things during daily tasks. They also look just as polished as longer lengths when the design is well-chosen. Starting with short or medium lengths gives you the best first experience with press-on nails.
Nail Prep for a Better Fit and Longer Hold
Correct sizing gives the press-on the best chance to hold. Correct nail prep ensures it actually does.
Push back your cuticles before sizing and before applying. The press-on should start at the base of the nail plate, just above the cuticle line, not overlapping it. Overlap onto the cuticle is a common cause of early lifting because cuticle skin does not hold adhesive the way nail plate does.
Clean each nail thoroughly with a lint-free wipe or an alcohol-soaked pad. Remove all traces of oil, old polish, and residue. Oil is the primary enemy of adhesive. Even a small amount of residue from hand cream or cuticle oil significantly reduces how long the adhesive holds.
Lightly buff the surface of each nail with a fine-grit buffer to remove the natural shine. A slightly textured nail surface gives the adhesive more to grip. Do not buff aggressively. Two to three light passes is enough.
Apply the press-on immediately after prep, before the nail has time to accumulate fresh oil from the skin.
Building Your Size Chart
After sizing your first Gush Beauty set correctly, write down the size you used for each finger. Keep this as a reference for future purchases.
Your size chart for one set does not transfer directly to a different set because sizes are not standardised across designs. But it gives you a starting point for similar sets from the same collection, and over time you will develop a general sense of which size range suits each finger so the fitting process becomes faster.
If you buy from the press-on nails combo sets, sizing each set in the combo independently the first time gives you a comprehensive reference for your entire press-on collection.
Frequently Asked Questions
Does my dominant hand need a different size than my non-dominant hand?
Often slightly, yes. The dominant hand is used more actively and the nails on that hand sometimes wear slightly differently, but the size difference between corresponding fingers on each hand is usually zero to one size. Measure both hands independently the first time and note any differences.
What happens if I apply a press-on that is slightly too wide?
It will lift from the sides within one to two days because the adhesive is bonded to skin on the overhang rather than nail. The overhang also creates a visual line where the press-on edge meets the skin, which makes the nail look artificial. If you notice after application that a press-on is slightly too wide, it is better to remove it and replace it with the correct size than to let it lift on its own.
Can I reuse press-on nails if I remove them carefully?
Yes. The Gush Beauty press-on nail collection is reusable when removed correctly. Soak the nail in acetone-based remover for thirty to sixty seconds to release the adhesive before gently sliding the press-on off from the side. Forced removal damages both the press-on and the natural nail. Properly removed press-ons can be cleaned, re-filed if needed, and applied again with fresh adhesive tabs.
How do I know if a press-on nail is lifting because of wrong sizing or wrong application?
Lifting from the sides near the base usually indicates a width fit issue. The press-on is either too wide and lifting where it contacts skin, or there was oil or residue on the nail at the time of application. Lifting from the tip usually indicates insufficient adhesive or a length-related leverage issue. Lifting from the cuticle area usually means the press-on was applied too close to the cuticle and is lifting as the nail grows.
Should I use adhesive tabs or nail glue for press-on nails?
Adhesive tabs give a gentler hold that is easier to remove cleanly. They typically last three to five days with careful daily wear. Nail glue gives a stronger hold that can last up to two weeks but requires more careful removal with acetone. For a special occasion where you want maximum hold for one to two weeks, nail glue is the better choice. For rotating designs more frequently or for trying new sets, adhesive tabs are more practical.
Can I mix sizes from different sets?
Not directly, because the size numbering is not standardised between sets. However, if a specific finger fits size 4 in one Gush Beauty set and you are applying a different set from the same collection, size 4 in the new set is a reasonable starting point for the same finger. Always verify the fit by holding the press-on against the nail before applying rather than assuming the same number will fit identically.
Where can I browse all Gush Beauty press-on nail options in one place?
Browse the full press-on nail collection at Gush Beauty. Use the shape filter to browse by almond, round, oval, or coffin. Use the length filter to browse short, super short, medium, or long. The press-on nails combo sets give you multiple designs in one purchase for experimenting with different looks.
Final Thoughts
Press-on nail sizing is not complicated once you know what you are looking for. Cover the full nail plate from sidewall to sidewall without touching the surrounding skin, and file down any size that falls between two options rather than forcing a fit.
Get the sizing right once for each set you buy and you have a reference that makes every subsequent application faster, cleaner, and more natural-looking.
Explore the full press-on nail collection at Gush Beauty. Browse by shape, by length, and by design to find the right set for your nails. Check the Bundles and Sets including the Nail Lacquer Set of 5 for painted nail options alongside your press-on collection.

Press-On Nails vs Gel Nails: Which Is Better...
Oct 23, 2026

From Office to Party: Press-On Nail Styles for...
Oct 19, 2026

Press-On Nails for Small Nail Beds: How to...
Oct 16, 2026

Press-On Nails for Weddings: How to Choose a...
Oct 12, 2026

Almond vs Round vs Coffin Nails: How to...
Oct 09, 2026

How to Choose the Right Press-On Nail Size...
Oct 05, 2026

Answers to the Most Confusing Beginner Beauty Questions
Sep 28, 2026

The Best Gush Beauty Products for a Minimal...
Sep 25, 2026

Beauty Trends That Look Great On Camera and...
Sep 21, 2026

Beauty Hacks That Make Your Makeup Last from...
Sep 18, 2026