 Gift Sets
 Fragrances
 Whip Lush
 BYOB Sale
 Eye Like Options
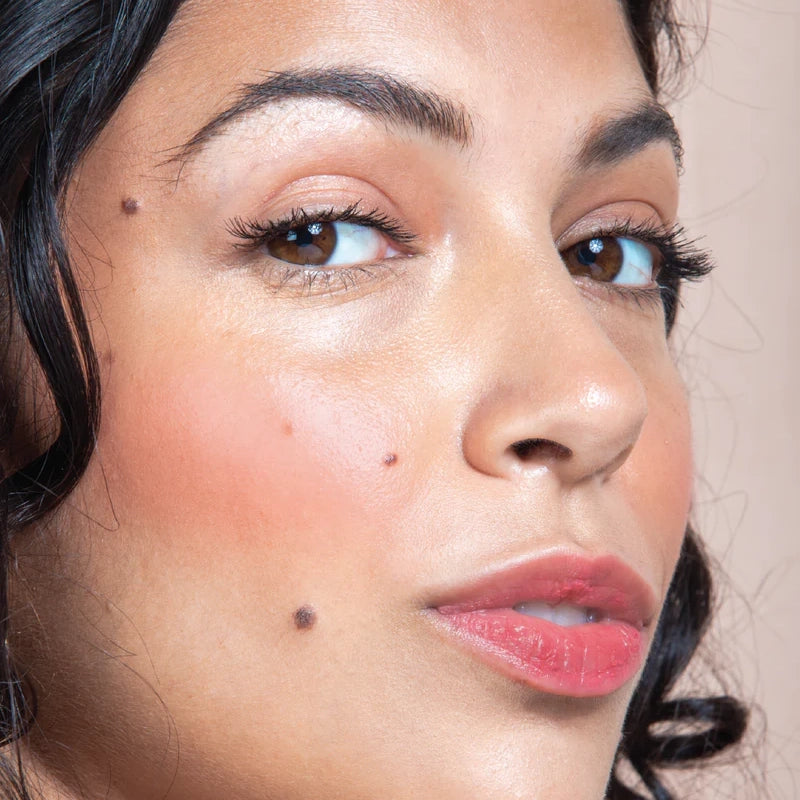 Glow Getter
 Play Paint
 Dart Its
 Stacked In Your Favour
 Bundles
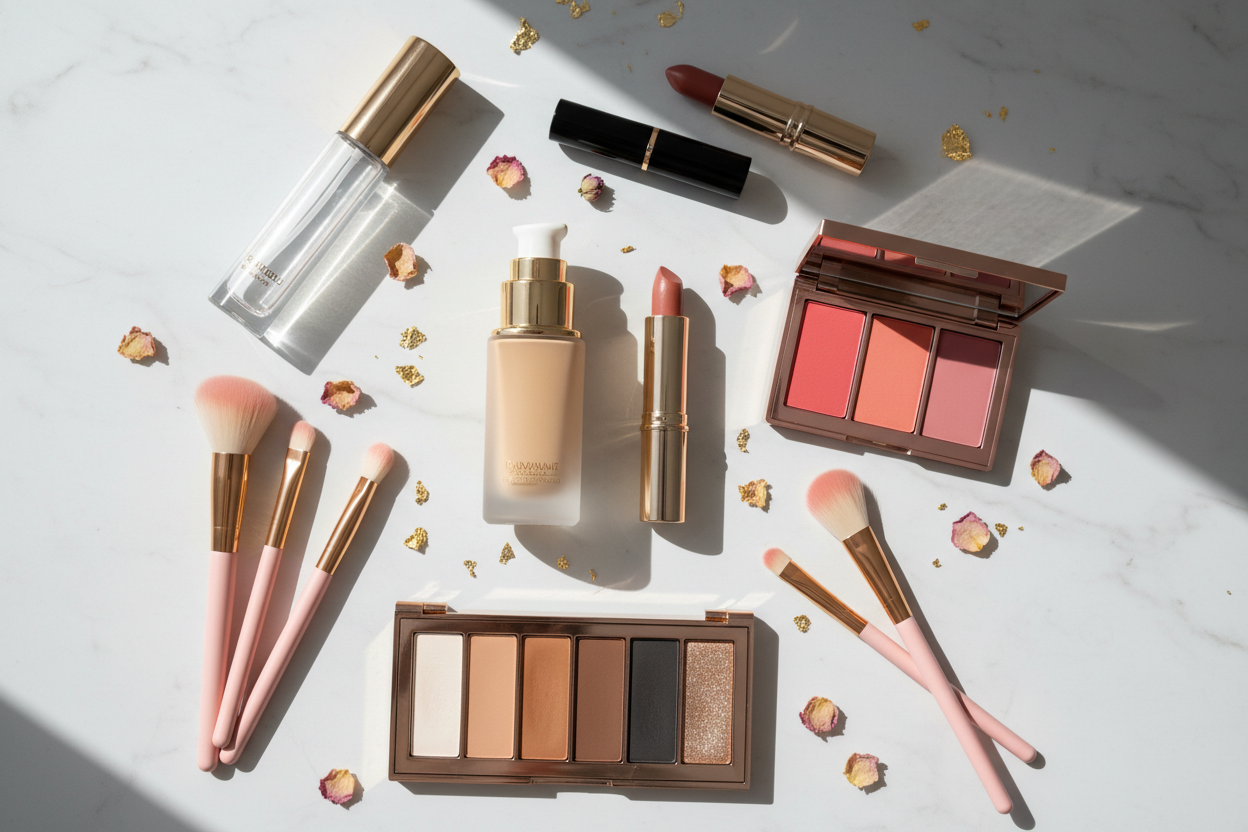
Step-by-Step Makeup Routine for Beginners
Starting a makeup routine feels overwhelming when you do not know where to begin. Too many products. Too many steps. Too much conflicting advice online.
This guide strips it all back. Here is a clear, step-by-step makeup routine that any beginner can follow. Each step is explained simply. Each product recommendation is practical. And the whole routine can be done in under ten minutes once you have done it a few times.
Everything recommended here is from Gush Beauty, a brand built around skincare-infused makeup that works for real people with real routines.
Before You Start: The Right Mindset
Makeup is a skill. Nobody gets it perfect on day one. The goal when starting out is to practice each step consistently so your hands learn the movements. The first few attempts may not look exactly how you pictured. That is completely normal and it gets easier quickly.
Start with a simple routine. Do not try to learn contouring, precise liner wings, and eyeshadow blending in the same week. Master three or four steps first, then add more when you feel ready.
What makeup should an absolute beginner start with?
An absolute beginner should start with four things: something to prep and protect the skin, something for the lips and cheeks, a simple eyeliner or kajal, and a lip treatment. These four steps cover your whole face and take under five minutes. Once you are comfortable with this foundation, add eyeshadow, a bolder lip product, and other items one at a time. Starting with too many products at once makes it hard to know what is and is not working for your skin.
Step 1: Start With Clean, Moisturized Skin
Step 1 of 8
Makeup sits better on clean skin. If you have not cleansed in the morning, rinse your face with water or use a gentle cleanser. Pat dry gently, leaving skin slightly damp.
Apply your moisturizer immediately while skin is still slightly damp. This helps lock in hydration and creates a smooth surface for everything that goes on top. Let it absorb for one to two minutes before the next step.
The Glow Getter Illuminating Moisturiser works perfectly here. It hydrates and adds a healthy natural radiance at the same time. It doubles as a makeup base so you get two jobs done in one step. From the Face collection.
Do I need to moisturize before applying makeup?
Yes, every time. Makeup applied over dry, unprepared skin looks patchy, clings to dry spots, and fades faster. A moisturizer creates the smooth, hydrated surface that makeup needs to blend and sit properly. Even if your skin feels oily, a lightweight moisturizer helps regulate the skin and keeps your base from sliding during the day. Skipping this step is the most common reason beginner makeup does not look the way it should.
Step 2: Apply Sunscreen
Step 2 of 8
Sunscreen goes on after moisturizer and before any makeup. This is not optional. UV exposure is the number one cause of pigmentation, premature aging, and uneven skin tone. All of these affect how your skin looks both with and without makeup over time.
Apply the UV U Later SPF 50 Sunscreen Serum across your whole face and neck. It has a serum texture that absorbs quickly and leaves no white cast. Let it sit for one to two minutes before the next step. It gives SPF 50 PA+++ broad-spectrum protection and works seamlessly under any makeup. Both from the Skin Care collection.
Keep the Sunscreen Stick in your bag for reapplication during the day. It applies cleanly over makeup without disturbing your look, which is important when spending time outdoors.
Step 3: Add Colour to Your Cheeks
Step 3 of 8
Blush makes your whole face look alive. Even on days when you wear nothing else on your face, a little blush makes a noticeable difference. It creates the natural flush that comes with good health and energy.
Smile gently to find the apples of your cheeks. Apply a small drop of the Squishy Serum-Infused Liquid Blush and blend upward toward your temples using your fingertips. Start with less than you think you need. Build slowly. The serum formula melts into skin so blending is very forgiving. From the Face collection.
How do I apply liquid blush for the first time?
Put one small drop on the tip of your finger and press it onto the apple of your cheek. Then blend upward and outward toward your temple with circular fingertip motions. Use your finger rather than a brush at first because finger warmth helps the formula blend more naturally. A very small amount goes a long way. You can always add more but you cannot easily remove liquid blush once it is blended in, so always start with less than you expect to need.
Step 4: Define Your Eyes
Step 4 of 8
You do not need eyeshadow to make your eyes look defined. A good eyeliner and kajal combination does most of the work on its own. This is the fastest way to make eyes look more awake and intentional.
Use the kajal end of the Eye Like Options 2-in-1 Eyeliner and Kajal on your lower waterline first. Draw it along the inner rim of your lower lid. Your eyes will look immediately more defined and brighter. Then use the liner end on your upper lash line, starting from the inner corner and moving toward the outer edge in small connected strokes. Keep the line as close to the lash base as possible. From the Eyes collection.
If your liner is not perfectly even the first time, blend any uneven edges gently with your fingertip. This softens the line into a subtle smudge that actually looks intentional and adds a flattering smokiness to the eye.
What is the easiest eyeliner for beginners?
Kajal or kohl liner is the easiest format for beginners because the soft formula is forgiving. Any mistake can be blended with a finger into a soft smudged line rather than needing to be removed and restarted. A felt-tip pen liner is the next step up. It gives more precision but requires a steadier hand. Liquid liner in a pot with a brush is the most difficult and should be saved until you are comfortable with other liner formats. Start with kajal on the waterline and build from there.
Step 5: Add Eyeshadow (Optional)
Step 5 of 8
This step is optional. If you are just starting out, skip it for now and add it once Steps 1 through 4 feel comfortable. When you are ready, here is the simplest possible eyeshadow approach.
Use one shade from the Eye Like It Stacked 4-in-1 Eyeshadow Palette. Choose the lightest or most neutral shade. Press it across the entire lid using your fingertip. That is all you need for a soft, cohesive eye look that still feels intentional. Once comfortable with one shade, add the deeper shade to the outer corner and blend the two together at the edges. From the Eyes collection.
How do I use eyeshadow as a beginner without it looking messy?
Start with a single neutral shade applied with your finger across the whole lid. This approach cannot really go wrong. Once that feels easy, add a second shade only to the outer corner and blend the edges where the two shades meet using small circular motions. Always start with less product than you think you need and build in thin layers. Shades from the same palette are the safest combination because they are designed to coordinate and will not clash or look muddy together.
Step 6: Colour Your Lips
Step 6 of 8
Lips are the fastest way to change the feel of a look. A bold lip makes simple eye makeup feel dressed up. A soft tint keeps a heavier eye look balanced. For beginners, something buildable and easy to apply without precision is the best starting point.
Apply the Play Lip and Cheek Tint directly to your lips with your finger or from the applicator. Dab it on the centre of your lips and press outward with your finger to blend. Build more layers for stronger colour. This is the same product used on your cheeks in Step 3, making it one of the most practical products a beginner can own. The pH-Inched Lip and Cheek Tint is another great option that adapts to your skin's natural pH for a custom, natural-looking result. Both are from the Lips collection.
For a bold lip without needing precise application, try the Play Paint Liquid Matte Lipstick. Apply to the centre of your lips and press them together. The colour spreads naturally. Use your fingertip to clean up the edges while the formula is still fresh.
Step 7: Finish the Lips With a Gloss or Oil
Step 7 of 8
A gloss or lip oil as a final step adds shine, makes lips look plumper, and ties the whole look together. This works especially well over a lip tint or any matte product.
The Juicy Lip Oil adds a glossy, nourishing finish that makes lips look healthy and full. For higher shine, the Glaze Lip Oil Gloss gives a more dramatic result. For an everyday lip that needs nothing underneath, the Butter Balm Hybrid Gloss Balm is conditioning and glossy in one step. All three are from the Lips collection.
Can I wear lip gloss without lipstick underneath?
Absolutely. Wearing a lip gloss or lip oil alone is a completely valid and popular look right now. It gives a polished, glossy finish that makes lips look healthy and full with no base colour needed. If you want a hint of colour, a tinted gloss or lip oil gives both shine and colour in one product. Apply generously, press lips together once, and the look is complete in under ten seconds.
Step 8: A Touch of Highlight on the High Points (Optional)
Step 8 of 8
This optional step takes the look from nice to genuinely glowing with very little effort. Apply a small amount of an illuminating product to the tops of the cheekbones, the bridge of the nose, and above the cupid's bow on the upper lip. These high points catch light and give the face a healthy, three-dimensional glow.
If you used the Glow Getter Illuminating Moisturiser in Step 1, your skin already has a base glow built in. To add more, dab a little extra on the cheekbones and nose tip with your fingertip. The Stacked In Your Favour Multi-Purpose Face Palette also includes a highlight shade for this purpose. From the Face collection.
Your Complete Beginner Routine at a Glance
Here is the full routine in order. Step 1: Glow Getter Illuminating Moisturiser on clean, slightly damp skin. Step 2: UV U Later SPF 50 Sunscreen Serum across the whole face and neck. Step 3: Squishy Serum-Infused Liquid Blush on the cheeks, blended upward. Step 4: Eye Like Options 2-in-1 Eyeliner and Kajal on the waterline and upper lash line. Step 5 (optional): one shade from the Eye Like It Stacked 4-in-1 Eyeshadow Palette across the lid. Step 6: Play Lip and Cheek Tint on the lips. Step 7: Juicy Lip Oil or Butter Balm Hybrid Gloss Balm over the lips. Step 8 (optional): extra dab of Glow Getter or a highlight shade from the Stacked In Your Favour Palette on the high points of the face.
To try multiple products at once without buying everything separately, check the Bundles and Sets at Gush Beauty. Sets like the Glow Getter Duo and the Glaze Lip Oil Gloss Trio give you great starting combinations at better prices.
The Step Nobody Should Skip: Removing Your Makeup
A makeup routine is not complete without a proper removal routine at night. Going to sleep with makeup on blocks pores, prevents skin from regenerating overnight, and leads to dullness and breakouts over time. Never skip this step.
Use the Clean Slate Cleansing Balm to remove everything in one step. Massage it onto dry skin, including over eye makeup. The oil base dissolves sunscreen, makeup, and daily buildup completely. Rinse with warm water. Follow with a light moisturizer and any overnight treatments like a Dart It Pimple Patch on any active spots. This whole step takes under three minutes. From the Skin Care collection.
Do I need a separate makeup remover and face wash?
Not if you use an oil-based cleanser or cleansing balm as your first step. An oil-based first cleanse removes all makeup and sunscreen effectively. A water-based second cleanse is optional depending on your skin type and how much product you wore. Many people with dry or normal skin find that a single oil cleanse is all they need at night. Those with oilier skin may prefer to follow up with a gentle foam or gel cleanser as well. The key is making sure the oil cleanse happens first so everything is fully removed before you go to sleep.
Final Thoughts
Eight simple steps give you a complete, polished beginner makeup look. Practice them in order and each step will get faster and easier with repetition. There is no shortcut to confidence with makeup except doing it regularly.
Explore the full Skincare-Infused Makeup collection at Gush Beauty to find every product in this routine. And if you are building your kit from scratch, the Bundles and Sets are the smartest place to start.

Cream vs Powder Products: Which Should Beginners Choose?
Jul 28, 2026

Build the Perfect 5-Minute Beauty Routine with Gush...
Jul 24, 2026

Social Media Beauty Trends vs Timeless Makeup: What...
Jul 20, 2026

10 Makeup Application Tips That Instantly Make Your...
Jul 18, 2026

Cruelty-Free Beauty Explained: What Every Conscious Shopper Should...
Jul 14, 2026

Bold Nail Designs for Short Nails That Make...
Jul 10, 2026

10 Makeup Application Tips That Instantly Make Your...
Jul 06, 2026

How to Choose the Right Sunscreen for Your...
Jul 03, 2026

Makeup FAQs: Beginner Questions Answered
Jun 29, 2026

How to Build a Simple Daily Beauty Routine...
Jun 24, 2026